HTTP Request Block
What it does: Connects your workflow to other websites and apps to send or get data.
In simple terms: Like making a phone call to another app. You can ask for information or send information to them.
When to Use This
Use HTTP requests to connect with external services:
- ✅ Get weather data from a weather API
- ✅ Send SMS messages through Twilio
- ✅ Save data to external databases
- ✅ Get information from Google, Facebook, or any service
- ✅ Fetch product details, prices, or inventory
Example: Get current weather from a weather service and send it in an email to users.
How It Works (Simple Version)
- You tell the block which website/service to contact
- You tell it what data to send (if any)
- The service responds with data
- You can use that data in your workflow
Quick Setup Guide
Step 1: Choose Request Type
GET: Ask for information (like reading a book)
- Use when: You want to get data from a service
- Example: Get list of products, check weather
POST: Send information (like mailing a letter)
- Use when: You want to create something new
- Example: Create a new user, submit a form
PUT: Update information (like editing a document)
- Use when: You want to change existing data
- Example: Update user profile, change order status
DELETE: Remove information (like throwing away paper)
- Use when: You want to delete something
- Example: Cancel subscription, remove item
90% of the time you'll use GET (to get data) or POST (to send data).
Step 2: Enter the URL
This is the address of the service you want to contact.
Example URLs:
https://api.weather.com/current
https://api.yourservice.com/users
https://example.com/api/products
Step 3: Add Data (If Needed)
If you're sending data (POST/PUT), add it in the body:
{
  "name": "{{customer_name}}",
  "email": "{{customer_email}}",
  "status": "active"
}
The {{Name}} and {{Email}} are replaced with actual data from your workflow.
Step 4: Test It
Click "Test the request" button to make sure it works before using it in your workflow.
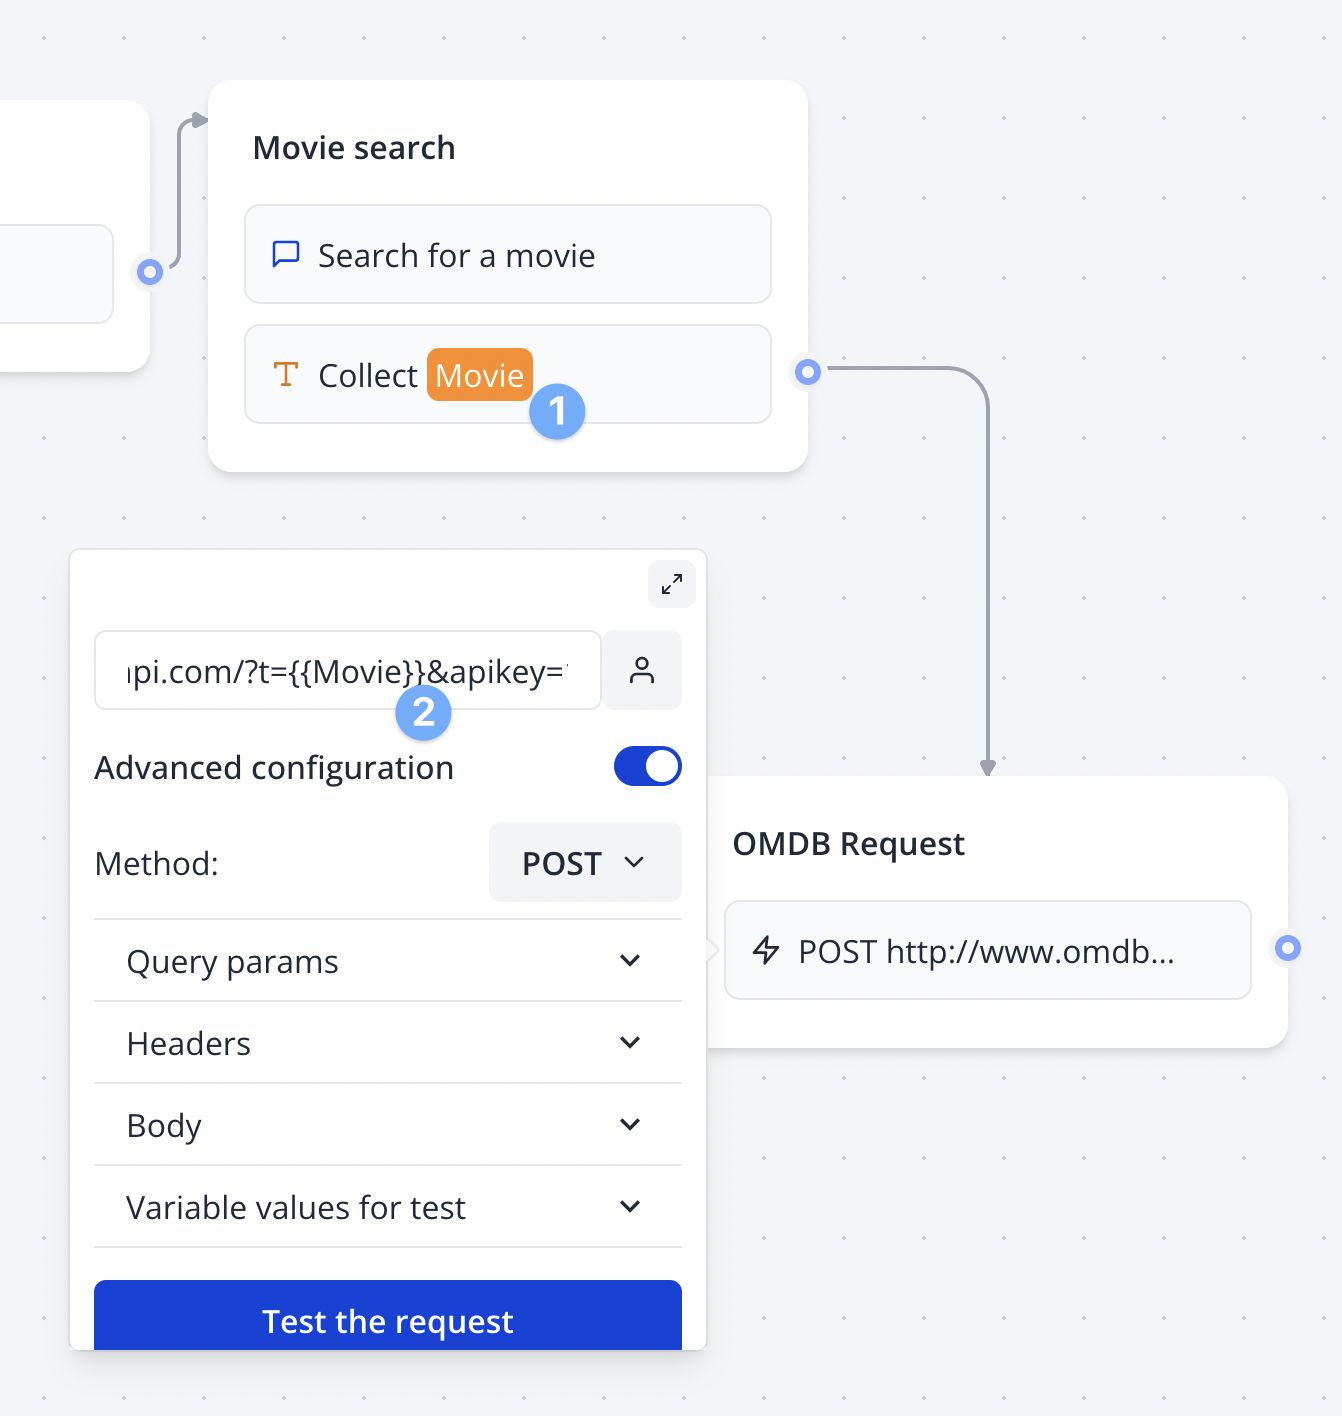
Real Example: Get Movie Information
Let's say you want to get movie details:
What You Want
Ask a movie database: "Tell me about Star Wars"
How to Set It Up
- URL:
http://www.omdbapi.com/?t={{Movie Title}}&apikey=your_key - Type: GET (because we're asking for information)
- Test Value: Set "Movie Title" = "Star Wars"
- Click Test: See the response
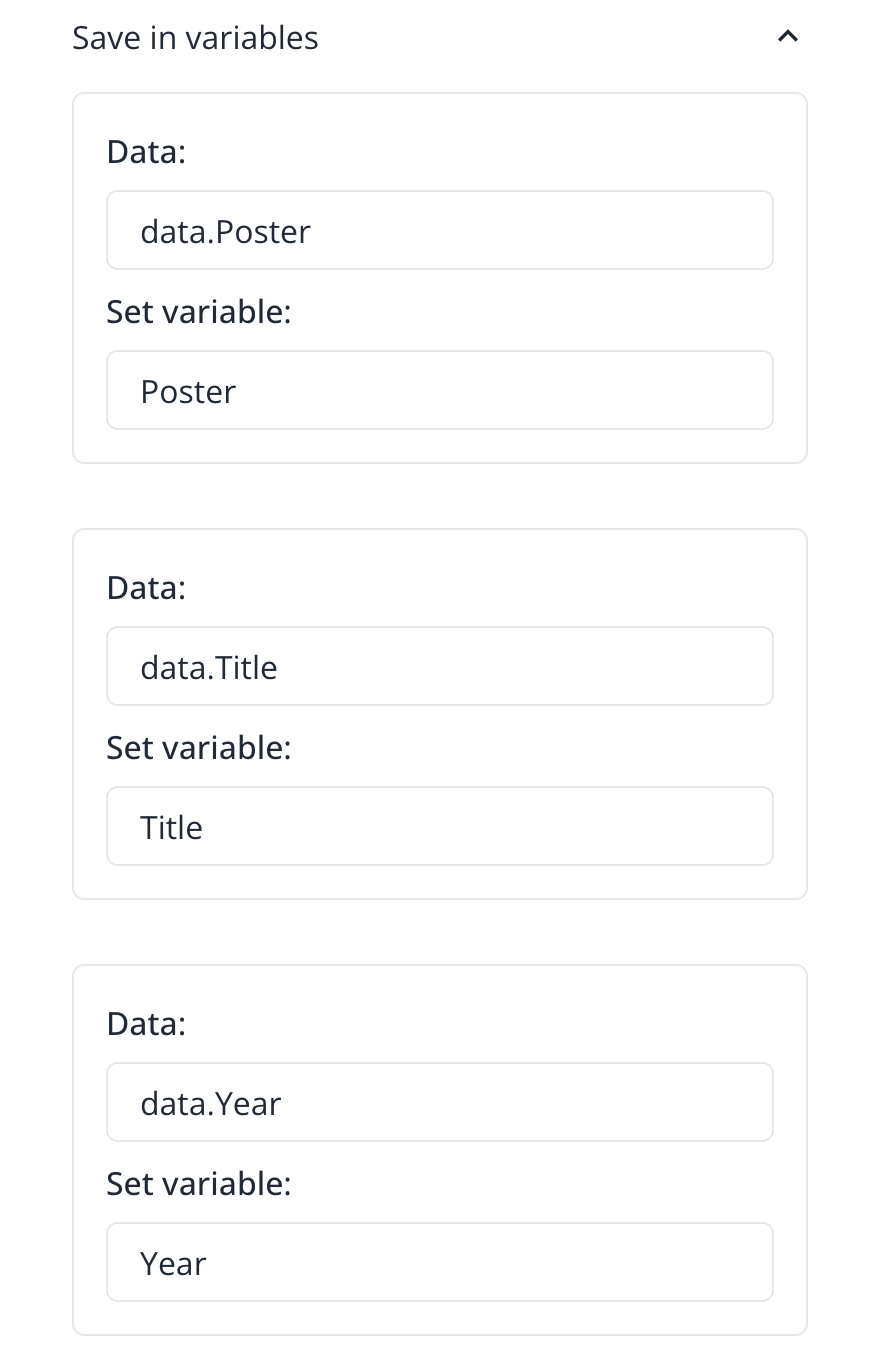
Getting the Response
After testing, you'll get back information like:
- Movie title
- Release year
- Director
- Plot summary
- Poster image
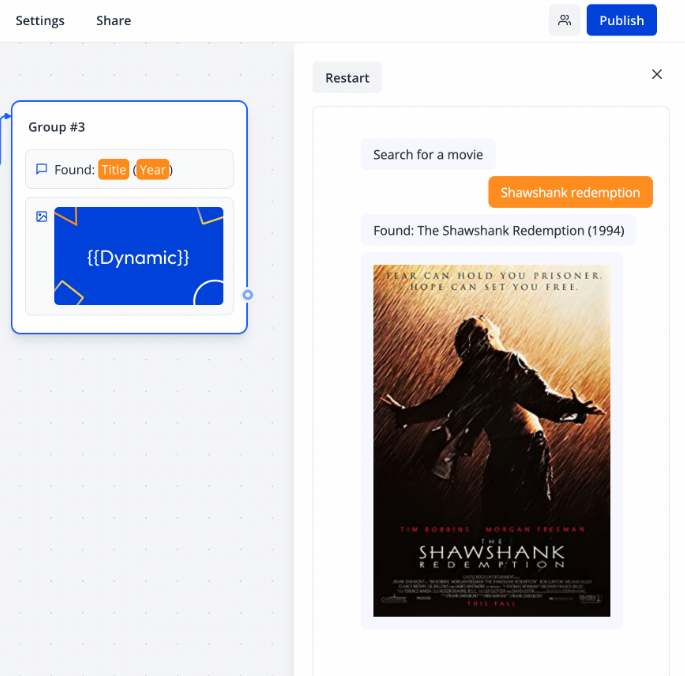
Using the Data
Now you can use this movie information in your workflow:
- Show the poster image
- Display the plot
- Send movie details in an email
Common Use Cases
1. Get Data from API
GET https://api.example.com/users
→ Returns list of users
2. Create New Record
POST https://api.example.com/users
Body: {"name": "John", "email": "john@example.com"}
→ Creates new user
3. Send Notification
POST https://hooks.slack.com/your-webhook
Body: {"text": "New order received!"}
→ Sends Slack message
4. Check Status
GET https://api.shipping.com/track/{{TrackingNumber}}
→ Returns shipping status
Understanding API Keys
Many services require an API key (like a password) to use their service.
Where to add it:
- In the URL:
?api_key=your_key_here - In Headers: Add header called
Authorization - In Body: Include it in your data
Keep API keys secret! Don't share them publicly. Most services give you one when you sign up.
Troubleshooting
"Request Failed" Error
- Check if URL is correct
- Make sure you have internet connection
- Verify API key if required
"Invalid Response" Error
- Service might be down, try again later
- Check if you're sending data in the right format
- Look at the error message for clues
Data Not Showing Up
- Click the test button first
- Check if you saved the response to variables
- Make sure variable names match
Tips for Success
- Always test first: Use the test button before running the workflow
- Read the docs: Most services have documentation explaining how to use their API
- Start simple: Try getting data before sending complex information
- Save responses: Store API responses in variables to use later
- Handle errors: Check if the request worked before using the data
Pro Tip: Many popular services have example requests in their documentation. Copy those and modify them for your needs!
Where to Find APIs
- Your own tools: Check if services you already use have APIs (most do!)
- Public APIs: Search for "free public APIs" for practice
- API directories: RapidAPI, ProgrammableWeb list thousands of APIs
- Documentation: Look for "API docs" or "Developer docs" on service websites
Next Steps
- Try connecting to a simple API like weather or quotes
- Learn about Variables to store API responses
- Explore other Integration blocks for specific services